How to Build Your Own Terrarium
/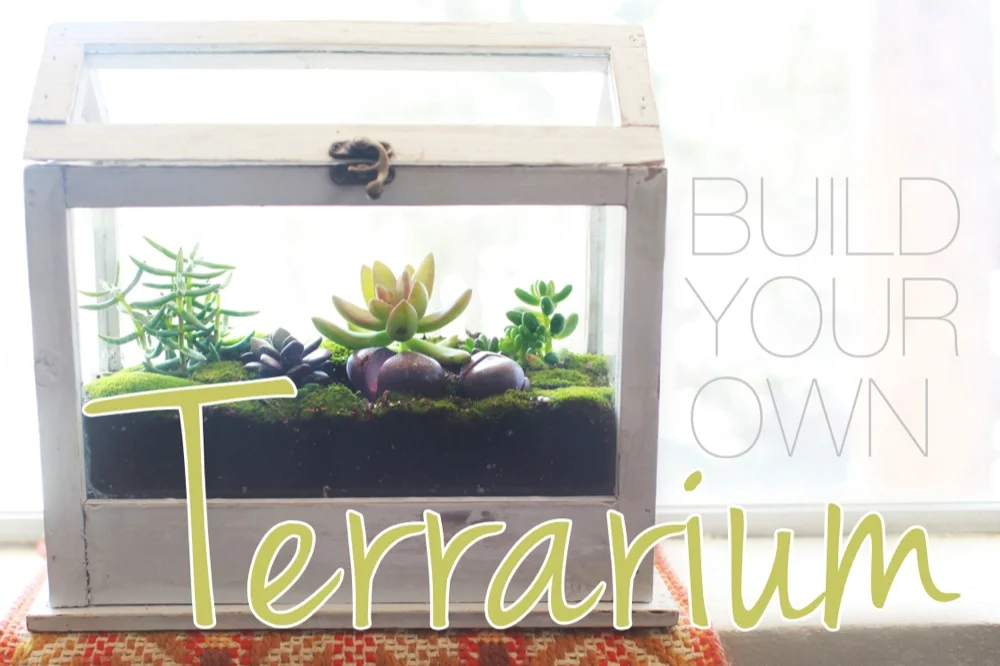
Terrariums are magical...don't you agree?! Every time I come across a tiny little world inside of a glass container, my heart skips a beat. And then it screams... "I WANT ONE! I WANT ONE!" So I finally decided to do something about this obsession...and make my own! And not only did I make a terrarium, but I combined it with my growing love of succulents. Let me tell you how I did it. Yessssss....let the awesome begin!
The first thing you need is a container. I found this adorable little glass house at Marshall's awhile back...but you can use any type of glass container that has a big enough opening for you to get your hand or a small shovel into. Fish bowls, clear blown glass, mason jars, you name it. If you have plants that need humidity (ferns, moss, etc) choose a container with a lid. For succulents, you don't need one with a lid. But I like the lid. And succulents. And I'm stubborn.
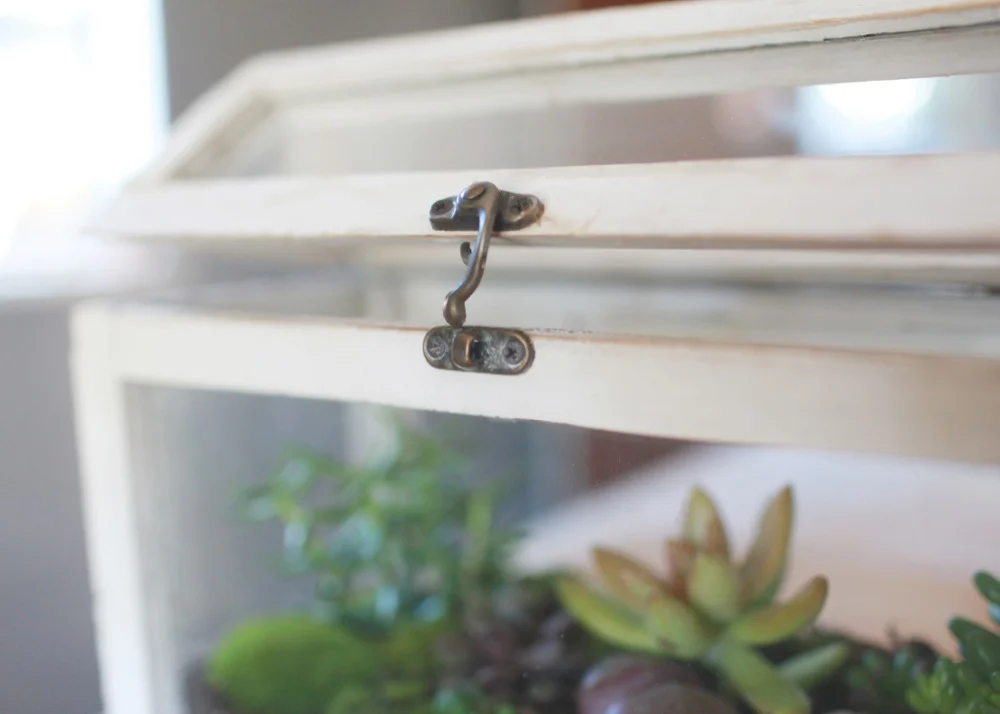
So I'm just going to keep the lid popped like this for part of the time. We'll see how that goes. If I hear them screaming for dry air late on a moonlit night, I'll just pop it all the way open.
Once you choose your perfect container, it's time to fill it with goodness!
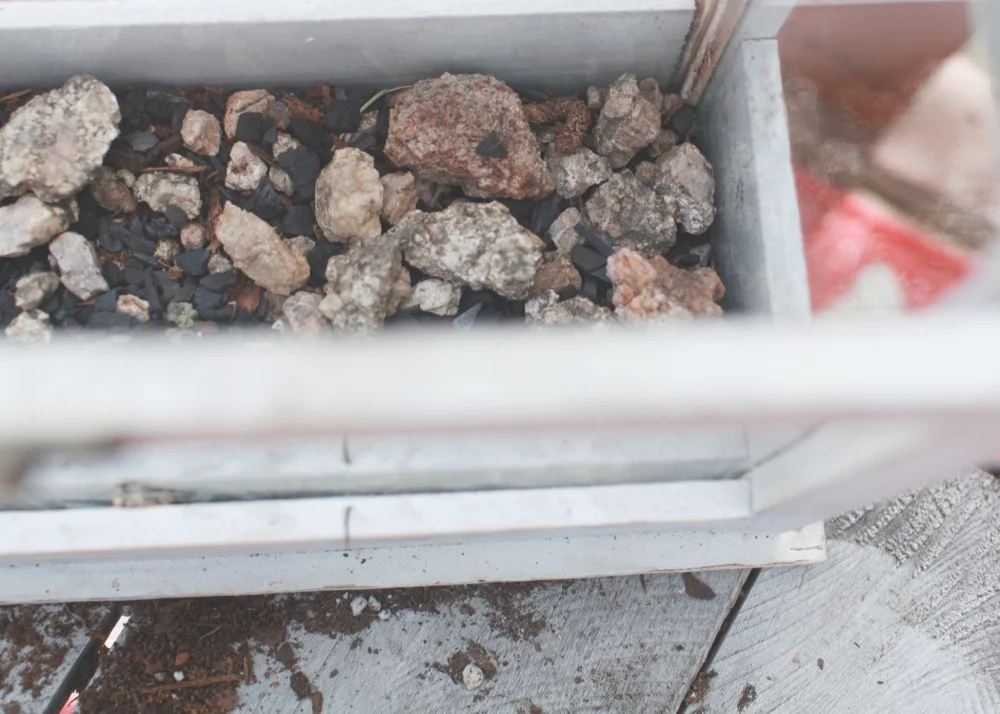
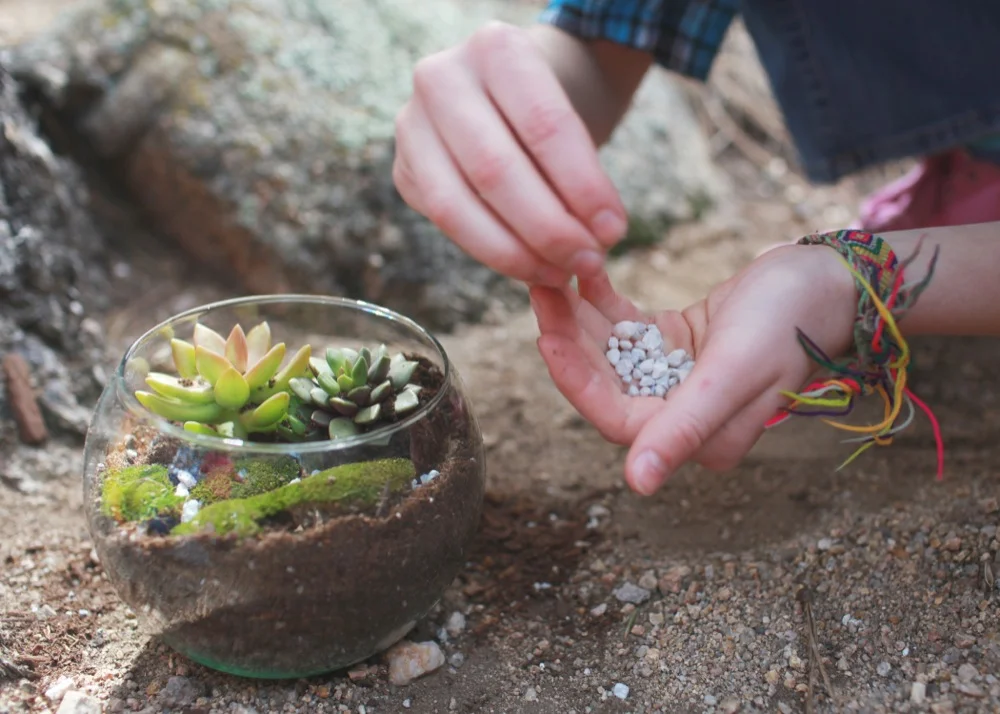
The first layer of the terrarium is a drainage layer...because your terrarium won't have holes in the bottom. We just went outside and gathered some rocks from our yard. On top of that, add a thin layer of charcoal (you can find this at a pet store or your local hardware/gardening store). The charcoal is important and will help keep your roots from rotting by filtering out excess moisture and will keep musty smells at bay.
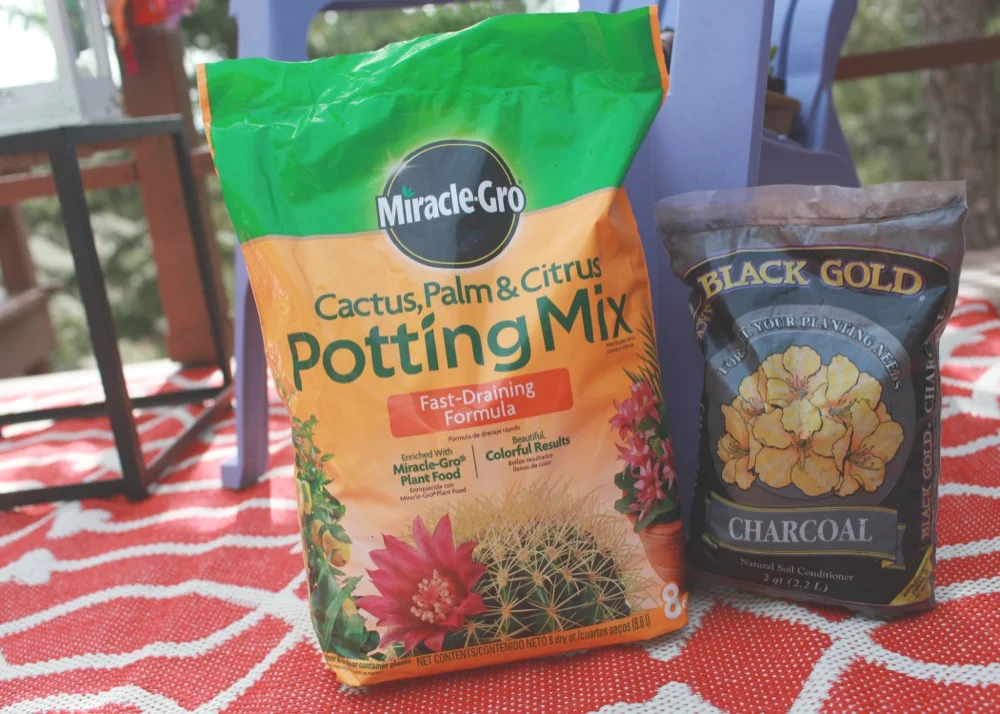
The next layer is the soil. I just used regular 'ol cactus potting mix. No, this one isn't organic...*GASP! Sara! You used to be so much more eco-friendly!". Yes. But on that particular soil shopping day, not having to make one more stop with 3 children to buy different soil was more important than saving the earth.
Whatever soil you choose, just make sure you match your soil with your plant type. Succulents should have fast draining soil. Ferns and other high-humidity plants can get along just fine in regular soil. Did you know you can make your own cactus soil blend by mixing 50% sand and 50% regular soil? Yep. You can!
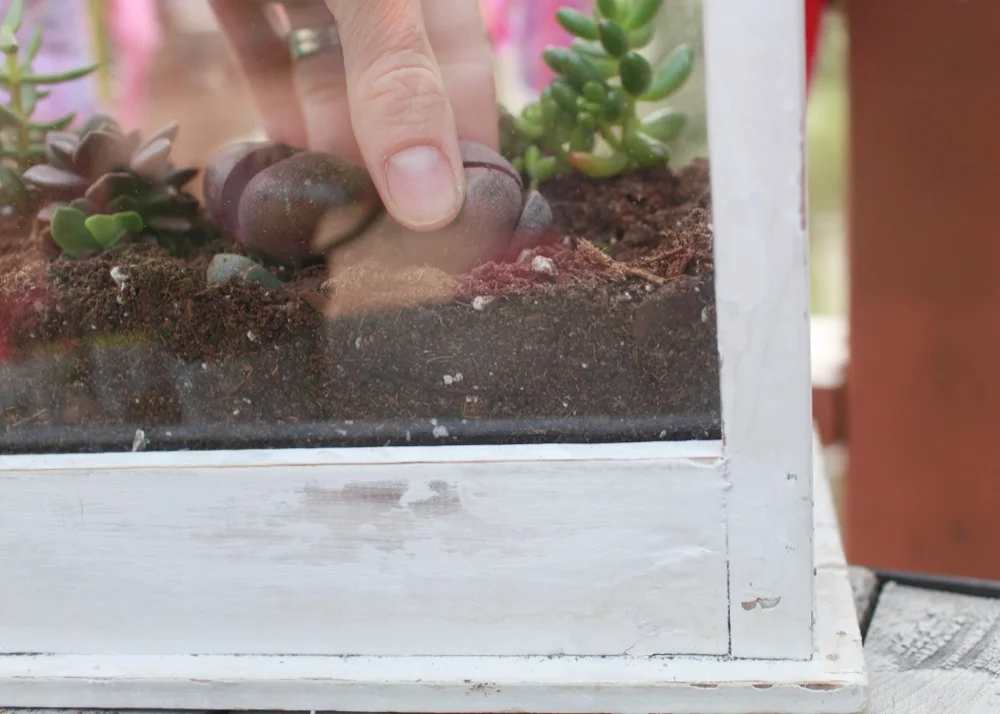
And now...the best part! Planting your little babies! Carefully take your plants from their container, gently loosen the root ball, and nestle them into their new home. Give them a little space and be sure to choose plants that aren't going to grow to be 5 feet tall! As your plants grow, you can trim back dead leaves, and remove any plants that get too big. Try your best to use plants that require the same conditions.
We collected moss from our rock outcropping...and it will most definitely need to be spritzed and watered daily. Way more than the succulents around it. Again...we're experimenting. Not claiming to be an expert...just sharing the love! So we'll see how it goes. I just couldn't resist bringing the moss inside. I love it so! I think our next terrarium will be moss only. A hanging globe with moss and rocks? Yes!
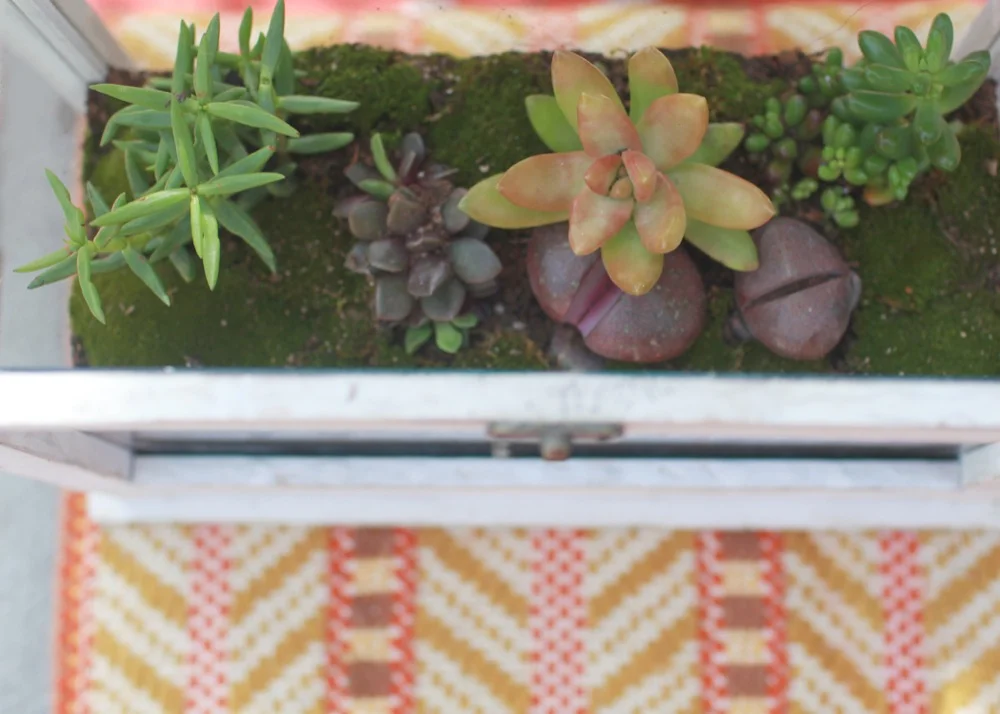
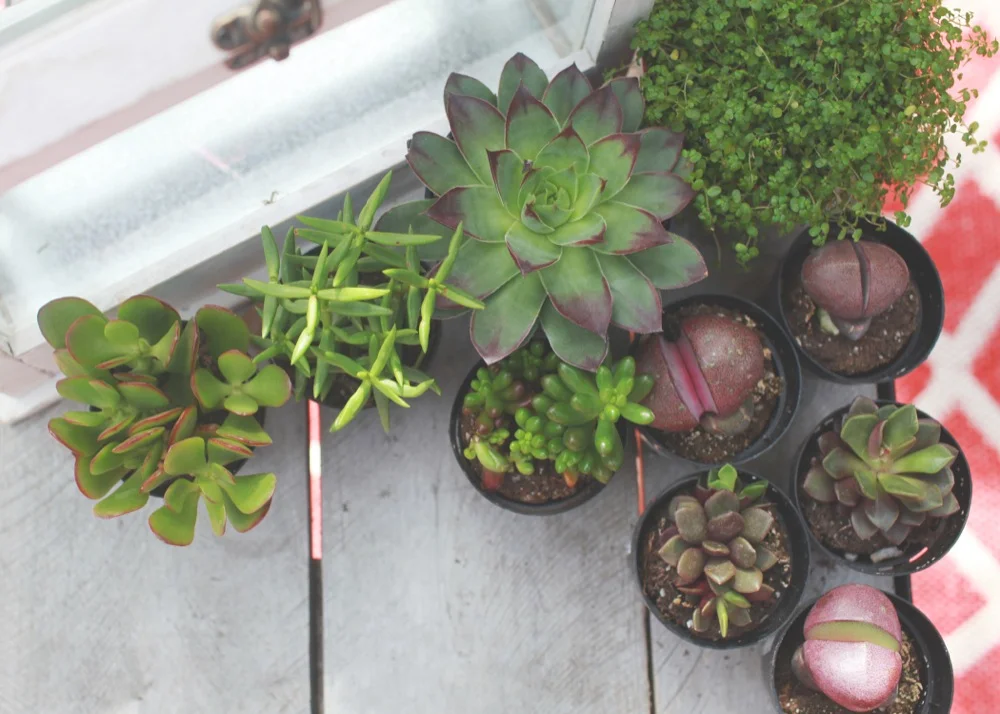
From left to right, our succulent line up...
Mini Pine Tree (crassula tetragona), Anacampseros Rufescens, Golden Sedum (sedum adolphii), Purple Split-Rock (pleiospilos melii 'royal flush'), and Sedum Pork & Bean (sedum rubrotinctum). All covered in that delicious moss.
I purchased all of these at Home Depot in Boulder. They have a spectacular array of succulents there and the prices are several dollars cheaper per plant than the competitors. I just happened to snag them the day they put them out...and each time I've gone back, I can tell that they are flying out the doors. I also love to buy plants from the local nurseries at the farmer's market. Boulder Farmer's Market starts this Saturday y'all (*said with breathless excitement).
Let's talk a bit about watering. Resist the urge! The number one reason terrariums fail is due to root rot and the moisture level being too high. If you're using a closed terrarium, there is the possibility that you may not need to water at all because it becomes it own little ecosystem. With open terrariums, you can water them...but cautiously. With succulents, wait until they have completely dried out to water again. Start slow and pay attention to what your plants are telling you!
Check out The Fern and Mossery's tips on curing an overwatered terrarium.
Here is a list of common terrarium mistakes and 15 great terrarium plants.
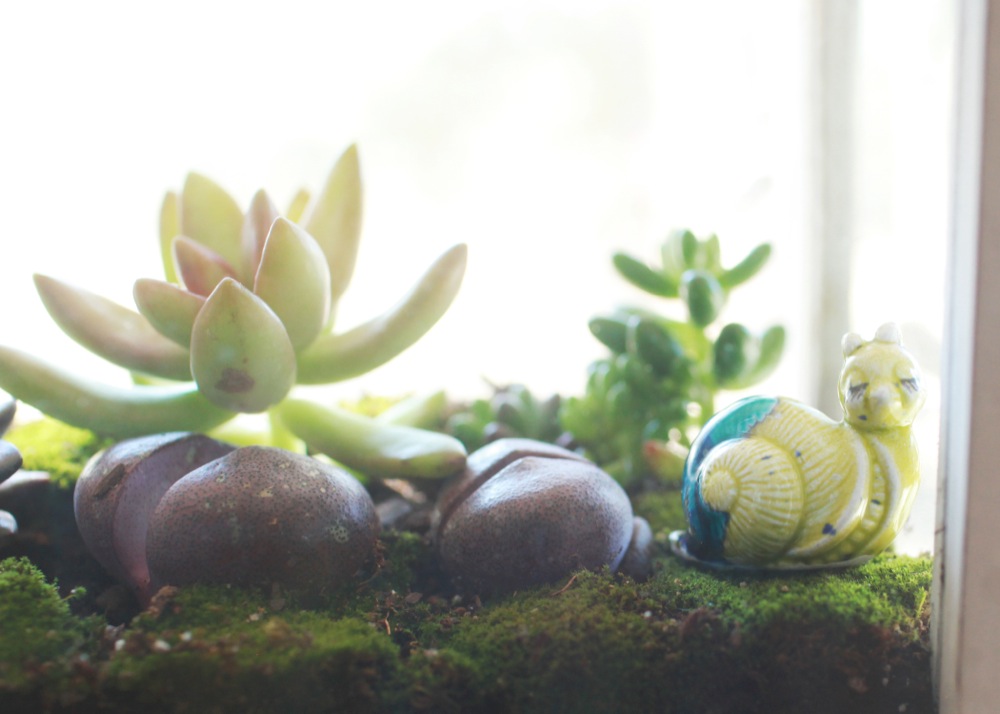
After I had finished with all the photos...Mrs. Fancy Pants, the snail pictured above, wandered by for a visit. You can have tons of fun filling your terrarium with tiny whimsical items. Fairies, animals, rocks and crystals...any tiny specials. I love tiny special things!
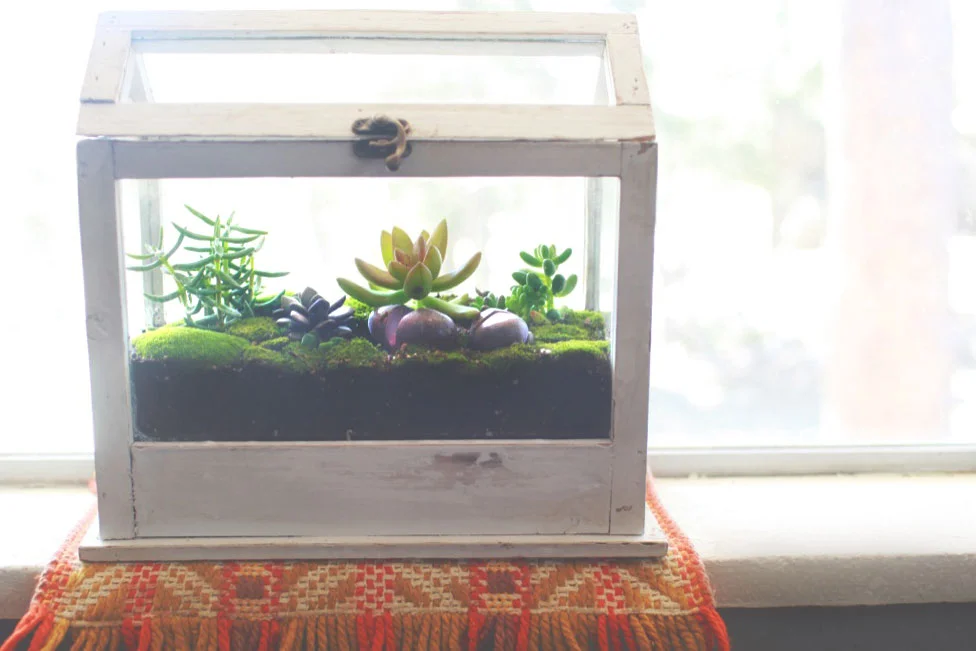
So there ya have it! I finally have my very own terrarium...and I can't stop staring at it! All of my other succulents are jealous because the new guys in town are getting way more attention.
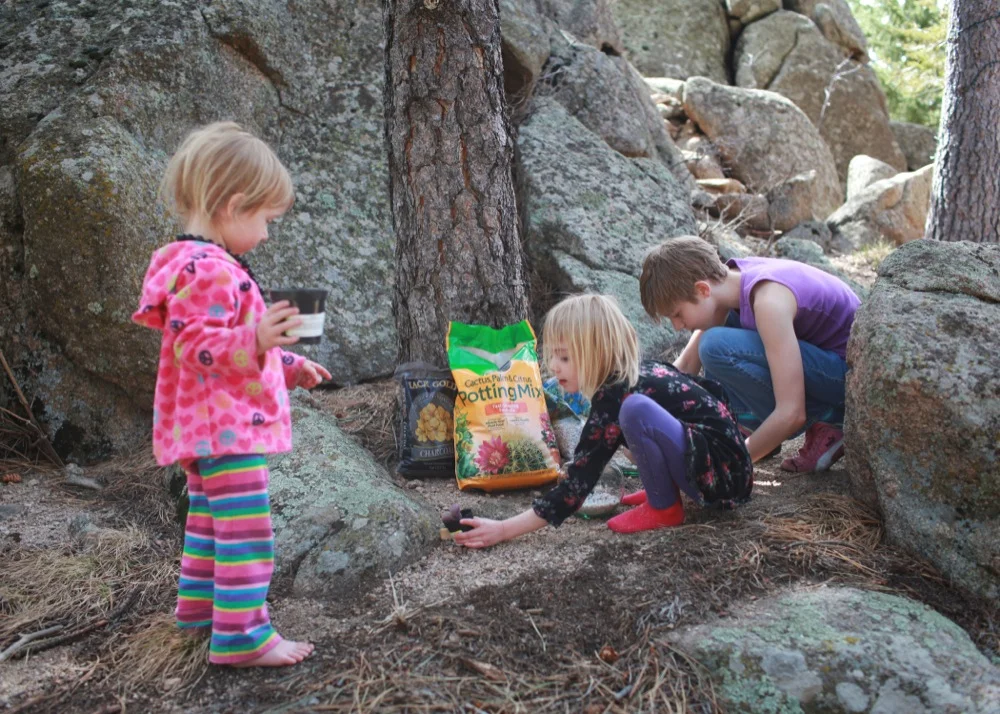
So why stop at ONE terrarium?! My sweet girls just had to get in on the action too. Terrariums are a wonderful activity for kids!
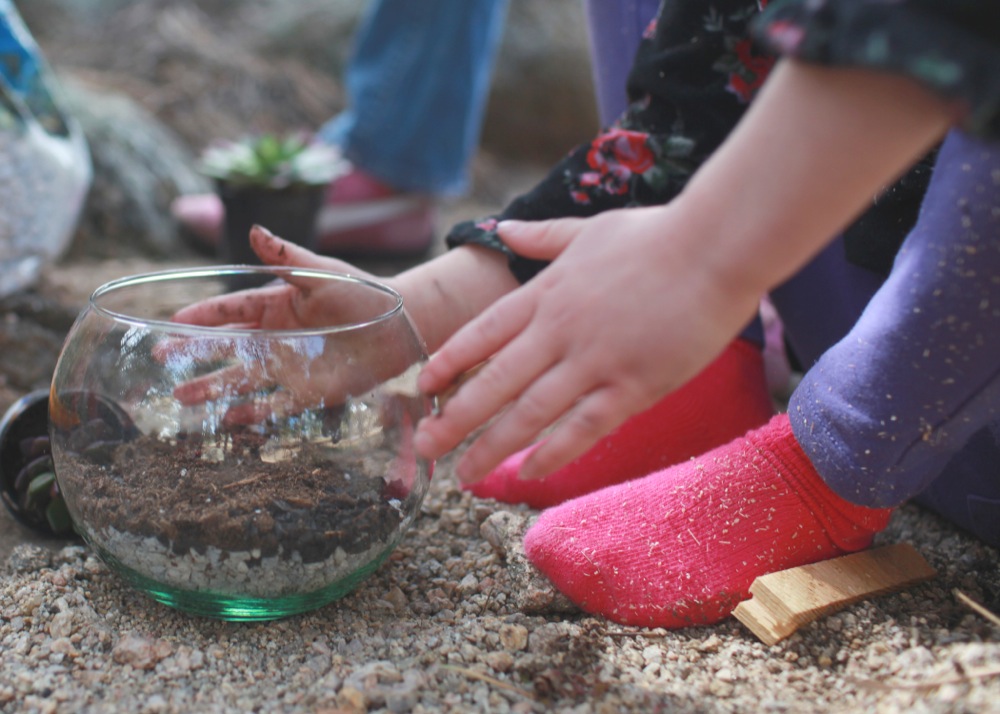
They chose these sweet recycled glass globes and got busy adding their layers.
I love witnessing them in creation mode...they were giddy to collect everything and get these all set up.
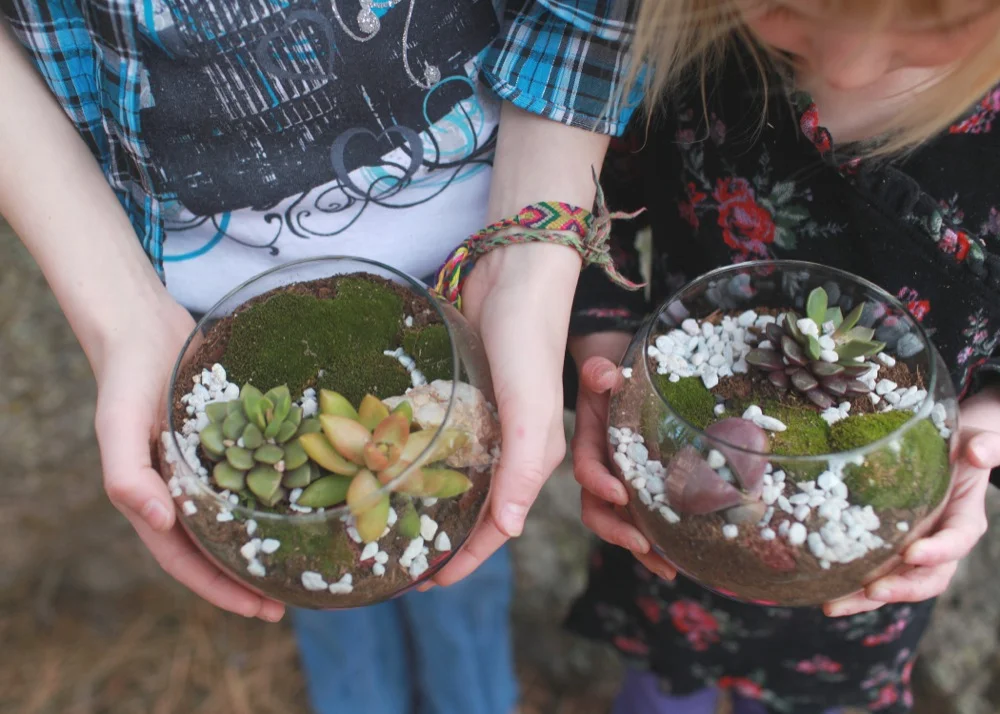
And there you have it! Now you can make your very own tiny terrarium world!
If you just love terrariums but don't want to make one on your own, you can buy them here, here, here, and here. I am especially fond of this company and their pretty pink rocks.
A few delightful terrarium books (*affiliate links):
Terrarium Craft: Create 50 Magical, Miniature Worlds
Tiny World Terrariums: A Step-By-Step Guide
Terrariums Reimagined: Mini Worlds Made in Creative Containers
If you enjoyed this post...help me spread the love and pin it on Pinterest!
My terrarium Pinterest board is here. And my succulent board is here.
If you already have a terrarium...
share your tips and ideas below!
P.S. Check out my other "How To" posts:
How to Be an Unschooling Family
How to Roast Coffee at Home
Five Ways to Engage Your Community
Fighting for Joy: Five Ways to Find Peace