Create an Outdoor Space You Love

20130429_7223_final

Today...one of my favorite friends, Natalie, is sharing 5 easy steps to creating the outdoor space of your dreams! Pay attention y'all...this lady knows her stuff! I'm inspired!

* * * * * * * * * *

Hello & welcome! My name is Natalie. I find joy in the everyday moments & share them on my blog. I am happily married to my husband & together we have a family of two sweet pups & a flock of chickens. We have a deep passion for living fully & simply in our home. We cook from the harvests of our garden & prefer old things to new.

porch_set1

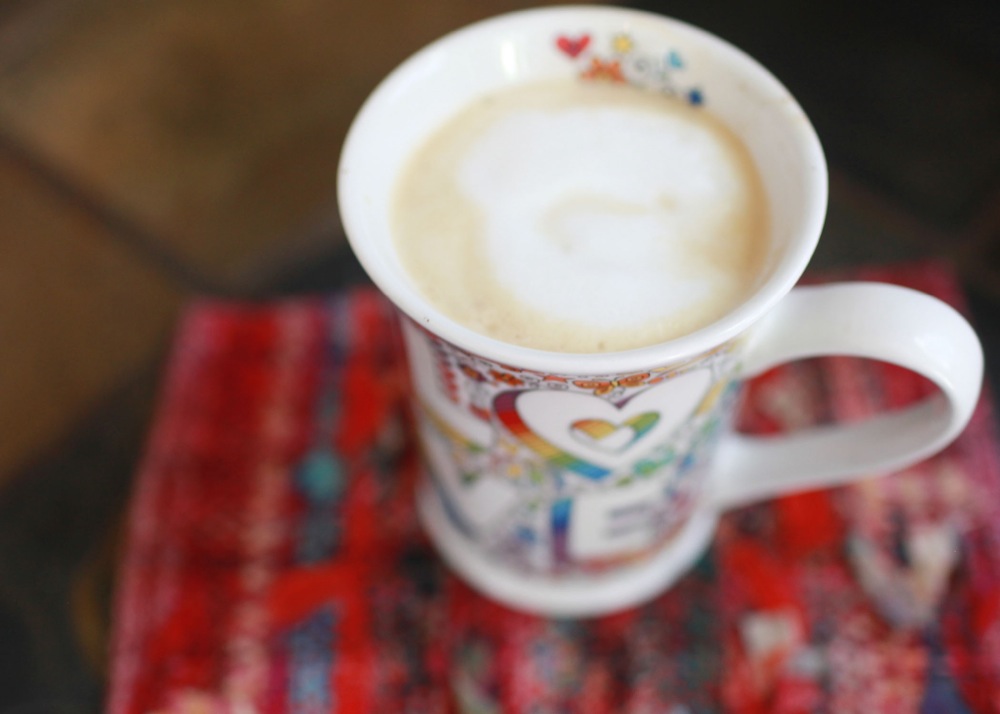
I was so excited when Sara asked me to feature one of our favorite spaces in our home- our front porch! I believe everyone should have a cozy, colorful spot for drinking coffee in the early morning hours & gathering for a meal with loved ones in the summer months. Today I am here to share some inexpensive, fun & colorful tips on making your outdoor space a little more delightful!

1. Lighting & Rugs

The first day we moved into our home, I hung twinkle lights on our paint-chipped porch. I love the soft mood of outdoor lighting in the evenings while enjoying a meal made from scratch. You can purchase string lights at Target & most big box stores for less than $15 a string, but I purchased several strings of lights at a thrift store for under $2 a box. Wait until after the holidays & most outdoor lighting goes on sale. You can also use christmas tree lights for the same effect.

I also believe what's beneath your feet is key to adding a colorful, fun feel to your outdoor living space. Just as you enjoy an accent rug underneath your couch or kitchen table, a rug under a bench, swing or metal chair outside provides a funky feel. I thrifted both of our rugs for under $10 each.

porch_set2

2. Bright Furniture

Both of the pieces above were found at yard sales for less than $3 each. With a can of spray paint, I added a unique spin to our outside furniture. The key is to have furniture that is comfortable & serves your hosting needs. You can always update the furniture with a bit of paint!

porch_set3

3. Table of All Sorts

The key to really living in our outdoor space is having a table where we can craft, read books, browse magazines & enjoy a delicious meal together. On most nights, you will find us outside on our porch eating dinner or talking about the day's events. We don't have a television in our home, so a lot of our time is spent outdoors, which we love & cherish.

We actually found our table for free in a friend's backyard. I cleaned it up, painted the top & used some inexpensive wooden chairs we already had. If you don't have space for a full size table, a metal or wooden coffee table beside a chair would work wonderfully for holding your favorite drink & a good book.

20130606_2532_final

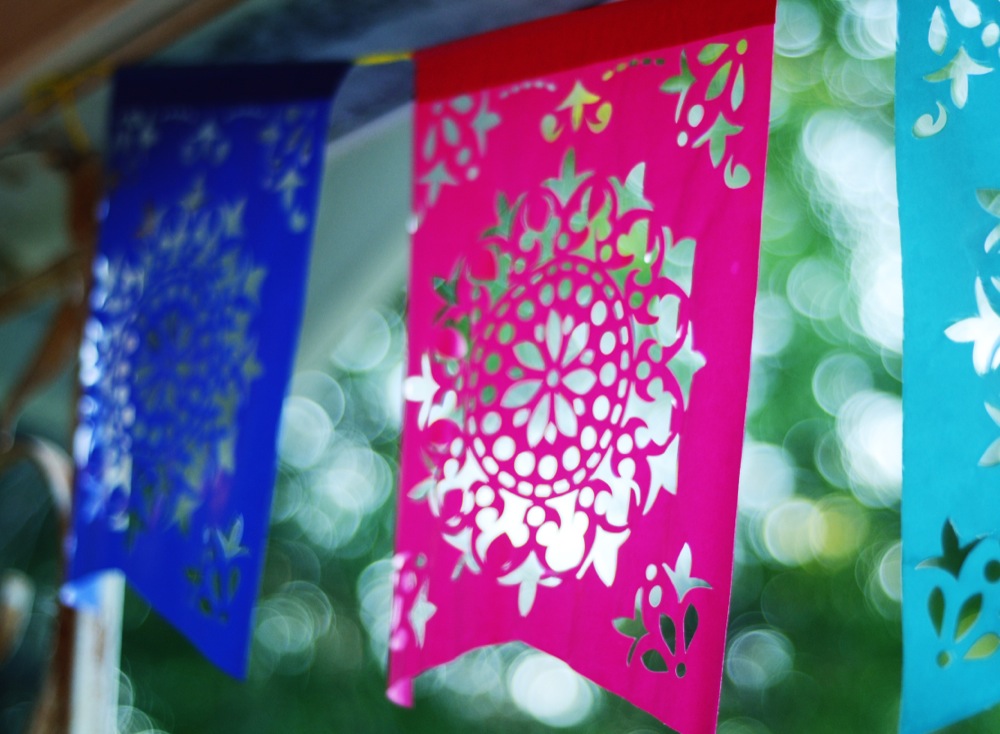
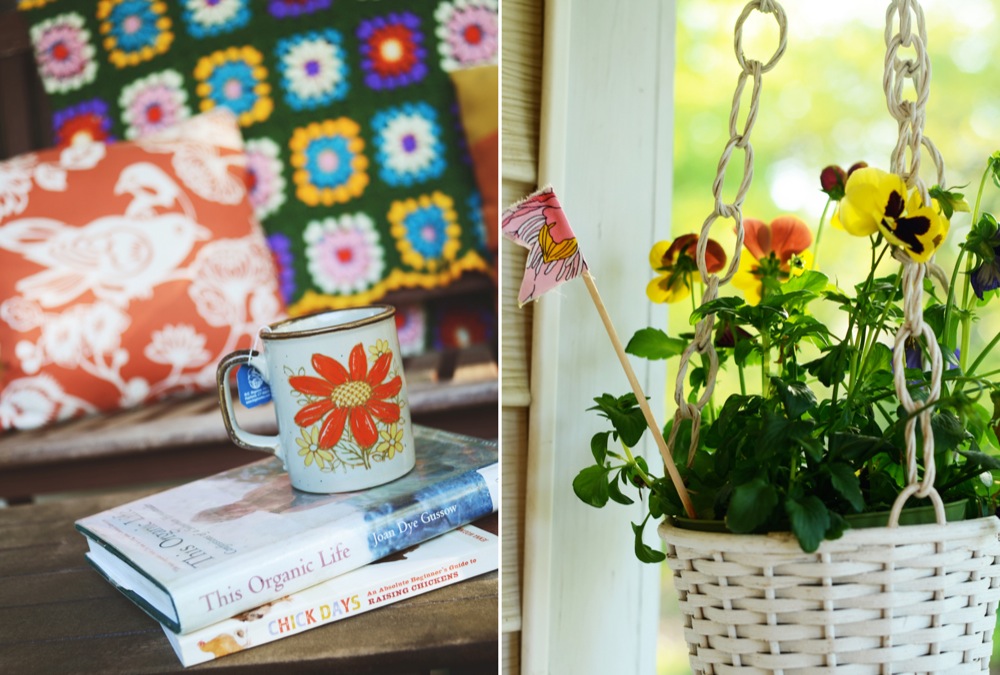
4. Colorful Accessories

Oh, we love adding whimsical patterns & punches of color to our outdoor space! I recently purchased the colorful flags from party city for under $5. Homemade bunting & prayer flags are great options, too.  We also enjoy adding crocheted blankets to our bench for cool evenings & throw pillows to chairs. We thrifted & handmade most of the blankets & pillows for our porch & I love that about this space.

20130606_2551_final

5. Plants

I believe plants should be in every room & what better place than your porch! We love adding hanging pots full of flowers & terra cotta pots of beautiful succulents. I love getting creative with pots. We turn old & rusty barrels into planters & hollow stumps into the perfect spot for growing mint.

With a small budget & a bit of creativity, you can have a front porch that is just as functional & lovely as your indoor living room. If your outdoor space does not have a roof, you can still have a green space full of potted plants with a handful of colorful chairs for hosting!

A big hug & thank you to Sara for allowing me to share with you one of our favorite spots in our home!

And now...we want to see YOUR outdoor space! Post your photos to Instagram with the hashtag #createaspaceyouloveoutside.

A note from Sara: Be sure to check out Natalie's blog (it's one of the few I read on a regular basis!) and her Etsy store. I am OBSESSED with her film photography postcards. I use them for letter writing, decorating the top of a gift, for framing...you name it.

Natalie is graciously offering a 25% Etsy discount to my blog readers! Use the code LIVEWILDLY25OFF for the next week.

Have a happy Friday everyone!

Around The Farm :: Settling In

tag_happyjanssenfarm_1370199346

17 lovely eggs were waiting for us in the coop on June 1 when we moved into the farm...a welcome gift from our new flock of chickens. We've been here for 13 days now, and we are deliciously exhausted...literally crashing into the bed every night. We've been digging and fencing and planting and feeding and dreaming. Lots and lots of outdoor play...while our boxes remain mostly packed inside. There will be time for all things...but for now, we live under the sun. Every day has held new adventures...we are learning so much, so fast.

tag_happyjanssenfarm_1370199570

To move right into a space and "inherit" 30 laying hens is...well...pretty awesome. The magic of going outside every morning and finding our breakfast there will never get old!  We have enough eggs for us and enough to sell...so if you are local, let me know!

tag_happyjanssenfarm_1370392736

On our second day here, we said goodbye to a very mean old rooster. A few days later, we welcomed Tony Stark and Ironman...sweet little bantam roosters (breeds: antwerp and porcelain). The girls ADORE them. They were hand-raised and handled daily by our good friends...so they are super friendly.

tag_happyjanssenfarm_1370839211

These four goaties are making me VERY happy. I would sit with them all day, every day if I could! We ended up getting 2 nigerian dwarfs, Cloud and Clover...and 2 nubians, Begonia and Blaster. Jet (nubian) and Violet (nigerian) will be coming to live with us after they wean in August. We'll have a sweet little herd of six...oh so wonderful.

tag_happyjanssenfarm_1370823949

It's so fun to see Emma interact with the animals...they have a special connection :) To go from never owning even a gerbil in the last 13 years to having SO many animals is a bit of a shock, but in a wonderful way! I've had people ask if we "knew what we were getting into". Taking care of animals and a farm is no joke...and yes, we were very aware of the time commitment and responsibility, but the rewards are HUGE! Now I can't imagine how we lived for so long without animals!

echo

This is Echo, our guard llama (and our friend Mary). She is 18 years old and is an experienced goat guard. She was quite aloof when she arrived, but is definitely warming up to us. Her deep brown eyes are captivating and she is so graceful and majestic. I love her so much already.

tag_happyjanssenfarm_1370733445

There are lots of other animals around the farm...here is a nest of robin's eggs that we found in a tree above the chicken yard. There are at least 3 other nests on our property with hungry and chirping babies in them...one is right outside our bedroom window!

tag_happyjanssenfarm_1370665824

There are frogs galore...

tag_happyjanssenfarm_1370665515

Lucy LOVES to hold animals and this froggy is no exception.

tag_happyjanssenfarm_1370648474
tag_happyjanssenfarm_1370457178

Much to the Bella's delight, our neighboring farm has 2 beautiful horses who graze at our fences.

Boots are a necessity around here...so we figure, why not have cute boots? :)

tag_happyjanssenfarm_1370315390

Clothes on the line...constantly. We don't have a dryer, so I've been enjoying hanging our clothes in the sun.

While we are getting settled, I will be posting a few guest blog posts, but you can find daily photos and happenings on Instagram...I use that space as a micro blog too. See you there!

How To Roast Coffee at Home

so much potential

I love coffee. Really good coffee. One night after geeking out about coffee preparation with my friend Khrista, I went searching for a reputable local roaster. I asked my Facebook friends what their favorite Boulder-based roaster was. And while I did get a few answers...the BEST answer I received was from another friend, Pucky.

He suggested that I could ROAST COFFEE BEANS MYSELF! I don't know why it never dawned on me to learn and experiment with it before. It always just seemed too difficult. He graciously bought me 5 lbs of green beans and had them shipped to my door. I've never looked back!

Getting started with roasting your own beans is so EASY. All you need is an air popper and a strainer. Now...it can't just be any 'ol air popper. The Poppery II from West Bend is widely known to be one that works great for air popper roasting. The Air Crazy is another that has been tested and works. You can find the Air Crazy here. The Poppery II is a little harder to find, as they don't make it anymore. I found mine on eBay, but you might be able to snag one at your local thrift store if you keep an eye out.

I would eventually love to bump up to a "real" coffee roaster...one that roasts more than 1/4 cup of green beans at a time. But for now, this works great!

popper inside

If you have a popper at home, you can try that too, but it MUST look like the photo on the right with the air vents that spin the beans around. Not the mesh bottom. The air vents on the right will spin the coffee while it heats, which is what you want. Here is a link to Sweet Maria's that details everything you ever wanted to know about the air pop/roasting method...including all the different models you could use.

First, I put 1/2 cup of green coffee beans into the hopper and plug it in...making sure the lid is on tight :)

Because this lovely chaff will start shooting out immediately and will continue on through the entire roasting. There will also be a nice aroma...and sometimes "smoke" that fills the air. All the books call it "smoke"...but it's more like a light fog :) that increases with the length of time you are roasting. If you have a vent or window to open, it's helpful...but I have even been roasting in the RV with no problems.

Every type/origin of bean will roast differently...and that's the fun part! My favorite bean so far has been organic/fair trade Columbian, with Organic Bali Blue Moon coming in at a close second. They both handle heat well and can be roasted dark. I've tried a couple that seemed to burn quick and not roast evenly. I roast my Columbian for 12-13 minutes.

Next, I pour the beans into a wire/mesh strainer and spin them until they are warm to the touch and not burning your hand.

At this point, I inspect the beans and pull out any that did not roast fully or have anything funky going on. Then I let them "rest" for at least an hour before brewing. Coffee is at it's most flavorful 4 to 24 hours after roasting. Which is precisely why if you enjoy coffee, you should roast your own. Even the coffee you can get from your local roaster will most likely be at least 24 hours old. In some cases, the beans you are buying are MONTHS old (or more...gasp!).

I store my beans in a re-purposed steel coffee tin...but you could use anything with a tight lid. Here are some great coffee storage tips.

hand grind

hand grind

Now...for the grinding! I am currently using a blade grinder, but have plans to be using this beauty soon!! My Dad used this all through my childhood and he recently gave it to me. It's an antique Arcade Crystal hand crank burr grinder! The screw is broken and I need to get it replaced, but I am SO thrilled to have this amazing piece in my home.

There are so many grinders out there to choose from. If I didn't have the Arcade, I might be getting this one. Or, even better, this one. The grinding style really does affect the taste of your coffee...so choose wisely!

My favorite method of brewing is the Aeropress. It quickly and efficiently makes espresso shots...with minimal mess! I've used it for several years without fail. There are MANY different methods of brewing with the Aeropress. In fact, there are even Aeropress World Championships where coffee aficionados compete with their own tweaked Aeropress style. There is even an iPhone app! It has a lot of different ways to brew.

Personally, I've been using a variation on "The Jay" (iPhone app version). I grind it to an espresso grind (fairly fine)...and dump it into the canister, with the plunger at about 4.

Much of the time, I use a Hario kettle because I love that I can pour it reeeeeeeally slow and controlled (which is great for making Chemex coffee, but that's a topic for an entirely different blog post!). Other times, I use my regular electric kettle.

After the water comes to a boil, I let it sit with the lid off for a few minutes to bring the temp down to 175-185 degrees. I then pour in just a little bit of water to allow the beans to "bloom" a bit. Then I pour it to the top and stir for about 10 seconds. I then replace the lid with a rinsed paper filter and screw it on tight.

I let it sit for approximately 2 minutes and then I invert it over my cup and press slowly for 20 seconds.

Voila! Espresso!! At this point, you can fill the rest of the cup up with hot water and you'll have an Americano. Or...

You can make a latte! I like to add a little foo foo to my espresso...and my handy dandy Nespresso Aeroccino has become my BFF in that area. It makes heated, frothed milk with the touch of a button. You can choose between frothing and foam...and it works AMAZINGLY well even with almond milk!

I like to add a little vanilla Monin syrup!

This is my favorite part of the process because I know my latte is soon to be done!

Nothin' prettier than a fresh latte on my mug rug!

This mama needs caffeine!

happy mama

happy mama

Aaaahhhhhh....happy mama!

So good. This process has saved me OODLES of money because I rarely go out for coffee any more! I've found my home roasted beans to be so far superior tasting, that everything else is just...well...bad :) And the frother/syrup fulfills my need for something fancy. Try it for yourself...I know you'll love it!

A few tips and links:

  • This seems like a lot of steps and somewhat complicated. It's not. Once my hot water is boiled, it takes 2 minutes.

  • The cleanup of the Aeropress is my favorite part. Just unscrew the lid and "snap" the puck of grounds out into the trash or compost. So easy! Rinse the device and you're done. So much easier than a french press.

  • Experiment! Roasting can be quirky. I got lucky and it worked pretty well on my first try. I think Columbian beans are a good starting point.

  • I have recently started to roast my beans longer than I THINK I should...and they usually turn out perfect. I used to dump them at the first smell of "burny"...but they needed a little extra time.

  • When roasting decaf, they tend to turn dark faster and it's hard to tell when they are done. I recently did a batch and I took them out early and cooled them...and then roasted them a little more to the color I wanted. I have no idea if this is the proper way to do it, but they turned out ok!

  • Educate yourself! Here are a few books I like:

books

books

Joe: The Coffee Book and The Blue Bottle Craft of Coffee. Both have AMAZING photography and are perfect for learning more about all things coffee! Joe focuses on east coast coffee culture, and Blue Bottle is west coast. Another great book is Home Coffee Roasting.

I currently buy my green beans from U Roast Em. They always ship very fast...I usually have them within 3 days. I would also like to start ordering from Sweet Maria's. Their variety is mind boggling...and I'd love to try some of their interesting blends. It's so fun to experiment!

And lastly, you must check out Sweet Maria's resource section. So much fantastic info there. I get giddy every time I click this link. Eeeeep! Coffee goodness! :)

And so...this has been my coffee roasting and Aeropressing journey. I look forward to my coffee daily! And because I know some of you will ask...I haven't completely abandoned my love of yerba mate! I was just getting burned out and needed something different. I still drink mate occasionally.

I can't wait to hear about your own coffee adventures! If you currently roast your own, I'd LOVE to hear your tips. I am such a newbie at this but I love it!

 **I am not affiliated with any of these companies and I’m not receiving compensation. Just sharing for the love!